Category: Cooking

Recipe #5: French Macarons

So if you thought I had a death wish when I decided to tackle puff pastry, think again. Pastry, shmastry! Puff pastry was a cake walk compared to making French macarons for the first time. Now I know why Laduree and Nadege charge a pretty penny for these dainty sweets.

To be honest, I didn’t spend a ton of time researching this recipe and maybe my results are proof that I should have spent more time studying before breaking out the almond flour. But I had six egg whites in the fridge after making those yummy Portuguese custard tarts. And I think I was feeling a little overconfident after making those divine tarts, nay, impatient to prove I could succeed again at making a *Patchka* recipe.

So here’s the deal with French macarons: historians tell a story of their origins in the 18th century around the time of the French revolution. Nuns who were seeking asylum made the meringue-like biscuits to sell in order to pay for their lodging at the local convent (there seems to be a pattern here with members of the cloth having a knack for baking–Portuguese custard tarts, anyone???). However, there are many other versions of the dessert that apparently date back as far as the 8th century.

And the name alone actually comes from the Italian “maccherone,” which means fine dough. There are accounts of future Queen of France, Catherine de Medici bringing the recipe over from Italy in the 1500’s.

The macarons we think of today–the two round biscuits sandwiched with a sweet filling in the middle–didn’t gain popularity until the 1930’s.

I watched an excellent tutorial by John, over at the Preppy Kitchen. He is meticulous and detailed in his explanation of the what, how and why of making macarons. There is even a term called “macronage” when it comes to incorporating the almond flour and icing sugar mixture with the stiffened egg whites. He is also not above pointing out that it took him many attempts before he got a decent batch of the cookies.
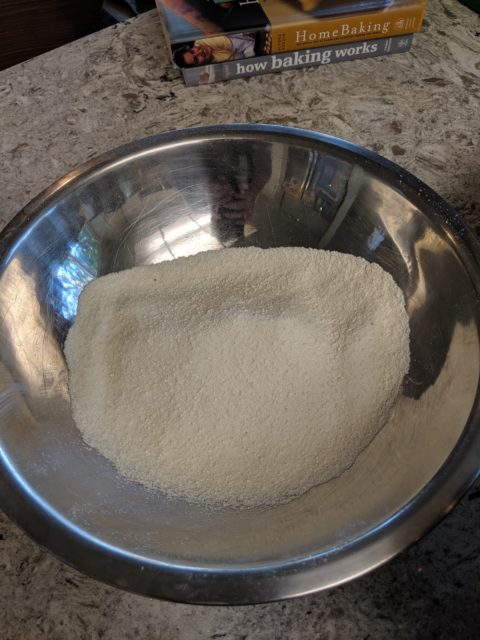
Super fine almond flour and icing sugar are sifted not once, not twice, but three times!
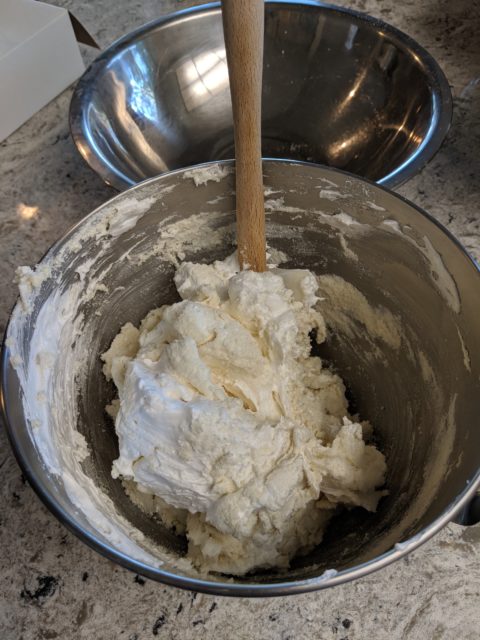
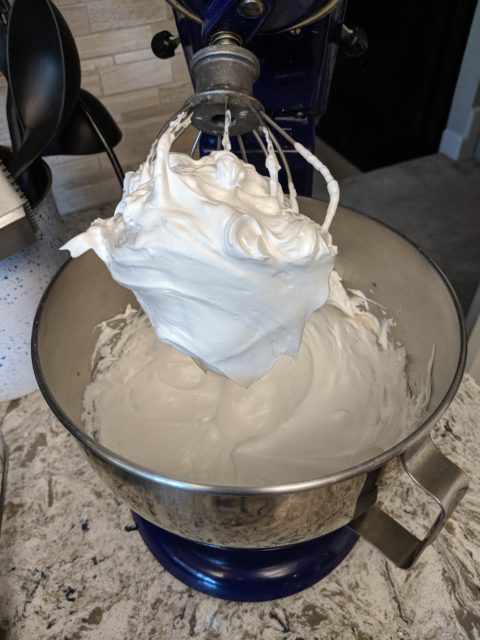
Egg whites are whipped to a marshmallow-like consistency
The delicate dance of “macronage” is underway.

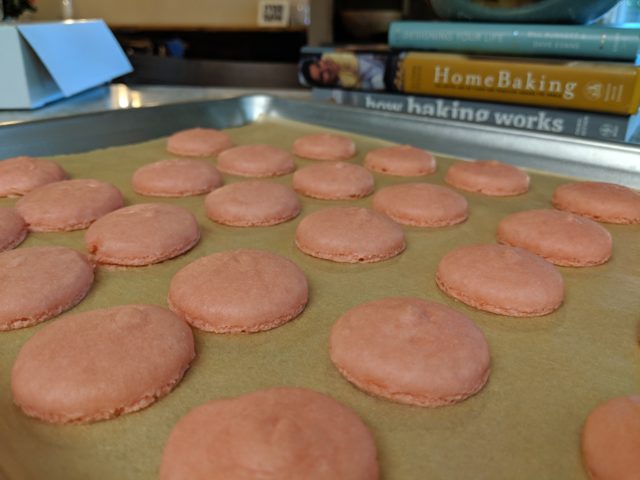
Although I followed his instructions religiously, my biscuits did not come out with a nice glossy finish or crispy exterior as I had hoped. I blame the oven entirely. They taste delicious even if they look a little bit withered. And they are nice and fluffy and chewy.
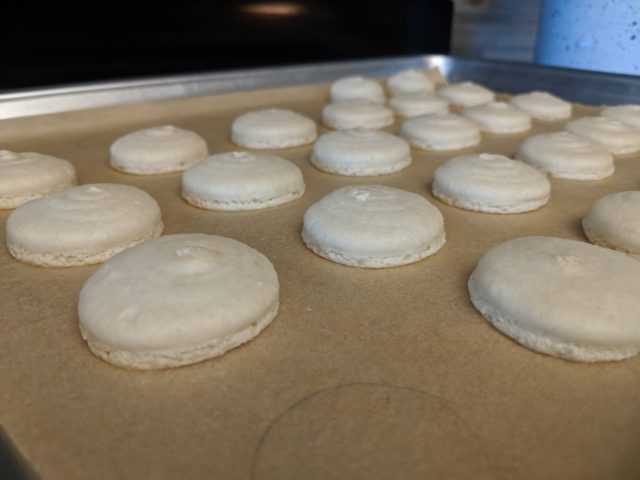
I made a simple chocolate ganache for the filling. Next time I think I’ll try a caramel filling or french buttercream. Or maybe I’ll use some homemade jam!
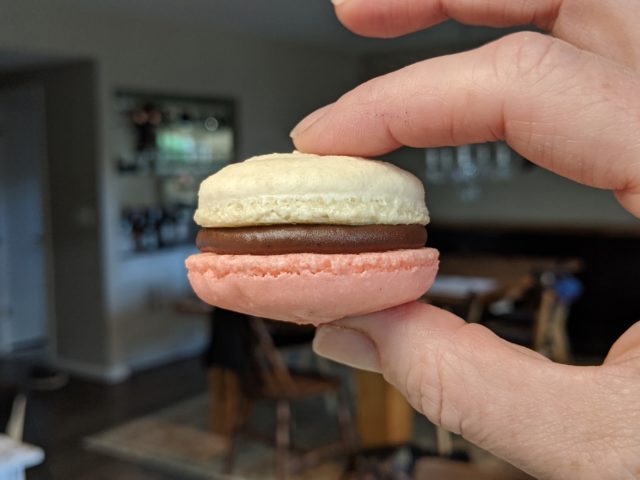
Kind of looks like a Neopolitan cookie, doesn’t it?

All these ideas have bolstered my resolve to attempt the recipe again. Just not tomorrow. I need to recover from Round One.
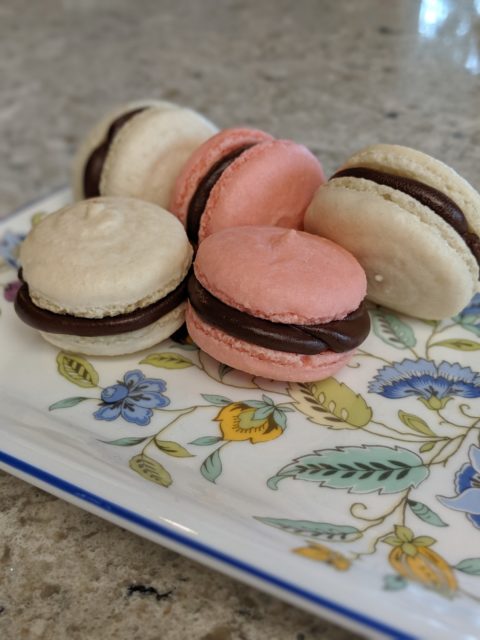
My first batch of vanilla macarons with chocolate ganache filling

Recipe #3: Homemade Puff Pastry

Anyone who wants to make their own puff pastry from scratch must be asking for a death wish, right? Who, in this day and age of convenience foods would dain to make the most Potchka (Yiddish translated: finnicky) pastry known to mankind? That would be me.

I read about making “rough puff” which is the home baker’s shortcut method of making puff pastry. And I did seriously consider doing that as a time saver. But who was I kidding? I knew this was going to take time so why not roll up my sleeves and take the scenic route.

I familiarized myself with the process by watching Anna Olson’s instructional video.

According to lore, puff pastry was invented by a French pastrycook’s apprentice in the mid 1600’s. Apparently there is evidence that something akin to French puff pastry already existed in Spain, and of course, in Greece there was phyllo dough (which I haven’t attempted to make yet). Regardless of its origins, puff pastry only gained in popularity with the passage of time and is now used as a staple in all sorts of patisserie.

The process starts with making the detrempe–that’s the flour, water and a bit of butter “base.”

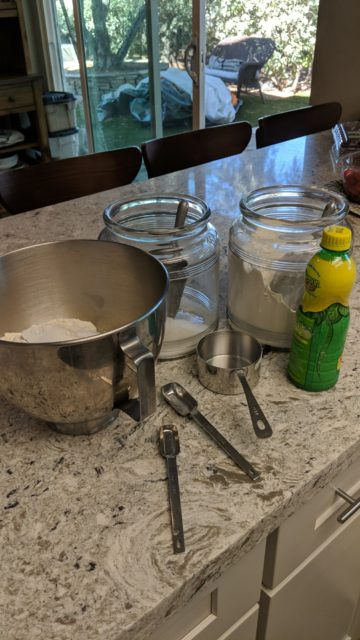
Setting out the ingredients for my puff pastry

This is followed by the beurrage, which is just pounds of butter (that’s three pounds in this particular recipe to be exact), mixed with a wee bit of flour so that it is maleable and doesn’t turn into a giant blob of greasiness.

Following the instructions closely, both of these were pressed into plastic wrap in an 8 inch by 8 inch pan and then placed into the fridge to chill for a minimum of 2 hours.

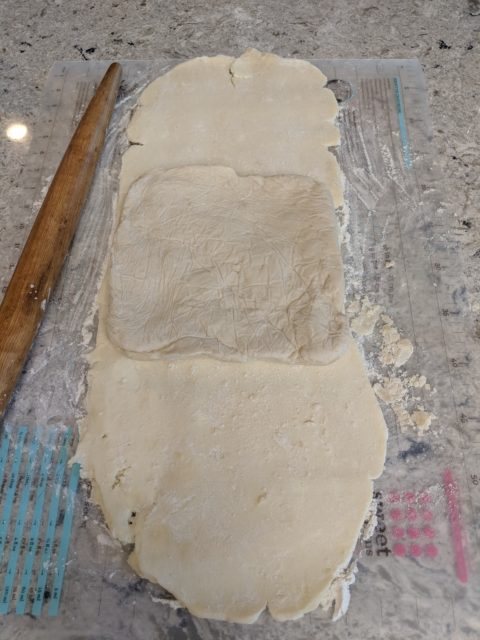
The next step involves laminating the detrempe and the beurrage together without compromising the integrity of each layer. Both need to be cold but maleable enough to roll out. I followed Anna’s suggestion and actually wrapped the flour mixture in the butter, which is not how most recipes suggest doing it.

That is butter (ALOT of butter) wrapping around the dough

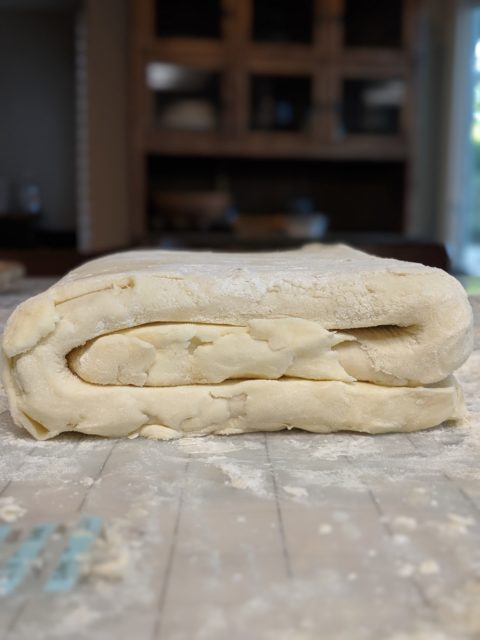
I worked quickly so as not to melt the butter layer. I folded and turned my sheets of pastry on itself in thirds a couple times before wrapping it up in a neat package and popping it back in the fridge for more chill time.

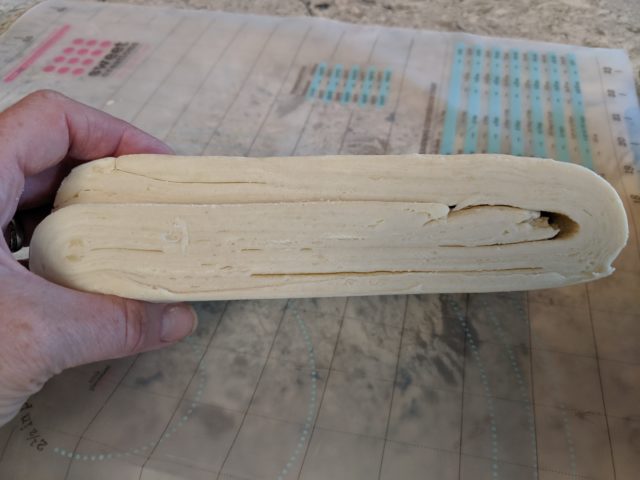
I repeated this a couple of times so there would be a good 12 layers or so.

Then I had to figure out what to make with this precious dough…would it be croissants? Tarts? Turnovers? Or should I go savoury and make something like Beef Wellington? Or chicken pot pie? You’ll have to wait until my next post to find out!

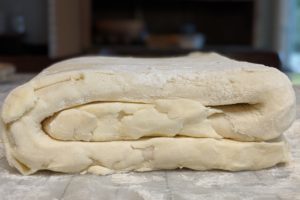
It may not look like much, but that is the beginnings of puff pastry
The laminated puff pastry, ready to become something delicious to eat!

Craving Comfort (Foods)

Homesickness is a bitch. I don’t remember experiencing this kind of ache for the motherland when travelling overseas as a twentysomething, or even when living in Vancouver while attending university. There are myriad reasons why I could be feeling the way I feel at any given time. Maybe it’s the change in the weather–dark mornings and dusky afternoons, shorter days, a crispness in the morning air. Fall is my favourite time of the year, so maybe it’s the root vegetables, squash and apples that are in season right now that have me pining for home. Whatever “IT” is, I’m craving comfort and comfort foods.

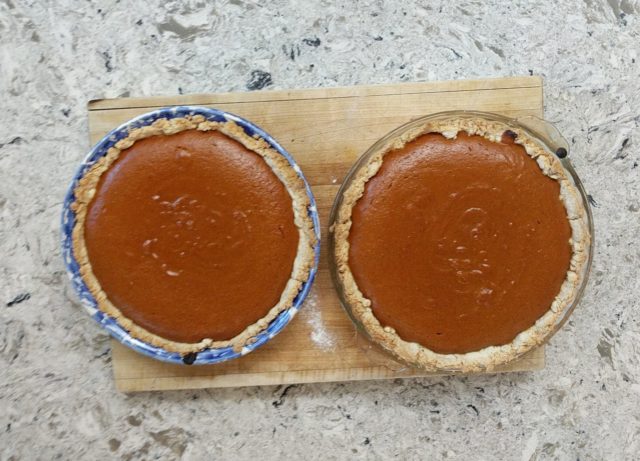
Today I was a bit manic about cooking and I made a pot of pureed butternut squash soup (a la Martha Stewart’s fabulous Everyday Food cookbook) and roasted a batch of golden beets. But things didn’t stop there–I missed the Thanksgiving long weekend up at my parents’ cottage in Thornbury, Ontario and I was really craving pumpkin pie, so I made the requisite two-pie recipe. The first was almost gone before it had completely cooled.

But the soup and the pie were just the bookends–I needed to come up with a really good stick to yer ribs kinda meal. Ribs! That’s it! I had some lovely boneless beef short ribs in the fridge that I thought would be labour-intensive to prepare, but I they weren’t. I sliced up an onion, popped it into a slow cooker, cut up the ribs in chunks, poured some amazing L & L sauce on top (this stuff is like GOLD because I brought a case of 12 jars with me when we moved from Toronto last January). L & L is like umami for grilling or cooking meat, it’s just that good.

Slow cooker braised short ribs with garlicky mashed potatoes and blanched green beans (and a side of butternut squash soup)

What goes better with slow cooked beef ribs than garlicky mashed potatoes? Nothing. So that’s what I made. Oh! And there were delicious, fresh from the farm green beans, blanched and sauteed in garlic oil.

This was the comfort food meal to end all comfort food meals (until I come up with another–ahem! chicken pot pie).

Double the pleasure: pumpkin pie

But it’s not just comfort food that I’m craving–it’s coziness. It’s Hygge I’m also longing for–that key ingredient to Danish happiness. Pyjamas, sweatpants, sweaters, blankets, slippers, pillows, duvets, LOTS of candlelight, tea with honey, hot chocolate–ANY hot drink and pastries, LOTS of pastries. I have been fairly successful at achieving Hygge in the past, but now that I feel like a displaced person I think my home senses that I am homesick and therefore it is slightly lacking in the Hygge department. So it’s time to pull out the blankets, fluff the pillows, light the candles, bake some cookies, or brownies, or other pastries, put on my flannel pyjamas and get cozy.


Supreme Jam Sesh at Summer Kitchen

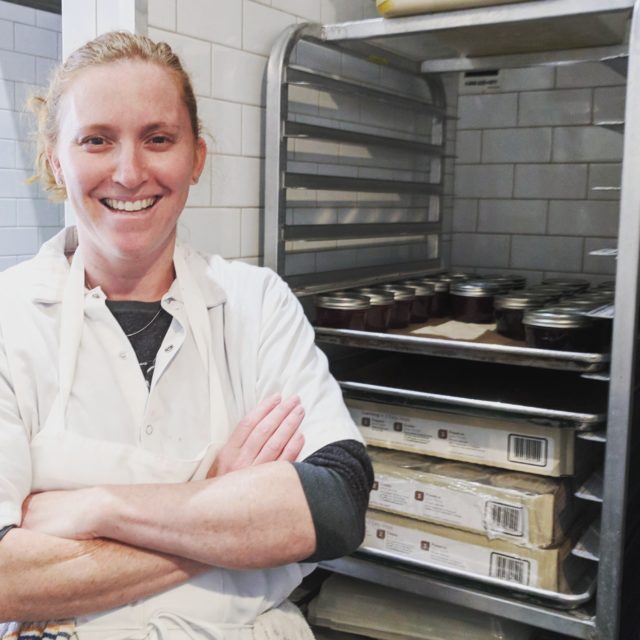
Today I got to put on a shirt and apron at a restaurant and make jam. Doesn’t sound all that thrilling, but for a wannabe it was SO. THRILLING. As my sister’s friend Jeff would say, I looked very profesh.

Looking like a professional

Here’s the back story: my husband has a cousin who lives in Oakland and runs a lovely little restaurant in the heart of Berkeley. She is a trained pastry chef and worked at the famed Chez Panisse. Her husband was an executive chef at restaurants in downtown San Francisco. Together they started Summer Kitchen and Bake Shop. The food is locally sourced and prepared fresh daily. Soups, salads, pizzas, sandwiches–all delicious.

We were visiting a couple of weeks ago and I was talking about how great it is to live so close to where the produce is grown all year round; especially fruit! I told them I had made a batch of strawberry jam, which I love to give as gifts to good friends and the kids’ teachers. They said they would love to be able to sell jam to their customers so I pounced at the chance to make some for them. The issue, of course, is that I don’t have a commercial kitchen, nor a cottage industry license (which you can get here) and I also can’t work, being a resident alien. My cousin said I was welcome to come up to the restaurant any time and make some jam with her. So I did!

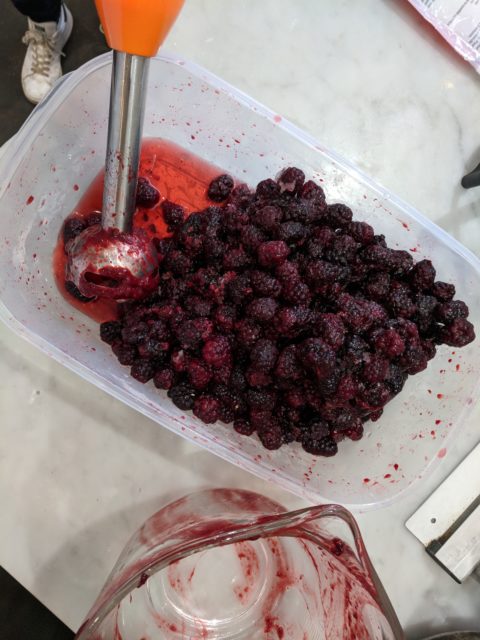
I brought two kinds of berries: the traditional strawberry, which is a crowd favourite, and the olallieberry. “The olalliewhat?” you say? The olallieberry is a cross between a Logan berry and a Young berry. They look similar to blackberries, but they aren’t as big and they are slightly sweeter, closer to that of a raspberry. The hybrid was officially named and released in 1950. They have a short season and are only available for a couple of weeks in June. I got an early batch from Gizdich Ranch down in Watsonville. If you ever wondered where your berries come from in the dead of winter (hello, Canada, I’m talking to YOU), then wonder no more: they come from Watsonville, California where fields of berries stretch beyond what the eye can see.

Olallieberries

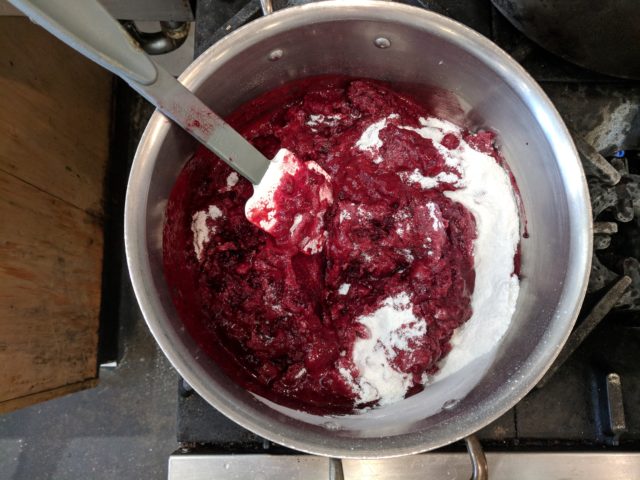
I made one batch of jam with Quickset, my favourite sugar/pectin mix from Redpath, but it was the only bag I still had from Canada. So we made our own version coming up with a good ratio of fruit to sugar and pectin for the remaining batches and I think the jam set quite nicely…I’m testing out a jar of olallieberry jam tomorrow morning (okay, maybe tonight) to see how the sugar/pectin mix worked with the fruit. If it works then I have a new formula and recipe for my jam since the old formula involved shipping the sugar/pectin mix from Canada, which is not exactly cost effective.

Sugar and berry mixture

I’m going to think of other combinations to mix with the fruit since it seems to be quite trendy (balsamic this, and pepper that). I’m a fairly simple girl when it comes to jam. I like to slather the jam on a slice of fresh baked bread or crunchy toast. Either way, the jam makes it taste that much better.

I’ve become one of those purveyors of “small batch, locally sourced, homemade [fill-in-the-blank-here]” but I don’t mind. In fact, I quite like it! Who knows? Maybe this could be the start of something really sweet.

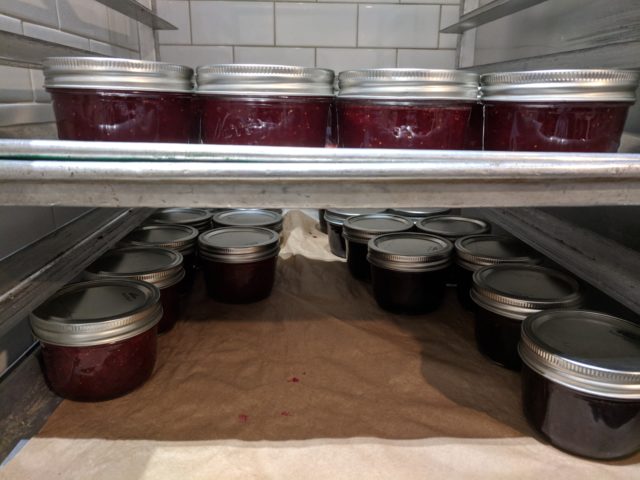
Jars and jars of strawberry and ollalieberry jam

Ignoring my blog

I’ve been ignoring my blog. Not really on purpose, but moreso because I don’t want to keep feeding it. I’ve been feeding Instagram and Facebook a lot in the last four months and I must say, social media has an insatiable appetite! I kind of did it to myself–a little over a month ago I took up a year-long challenge to post a photo a day. There have been days when I’ve struggled to think of a decent picture to post (just see the one of my messy kitchen) and it’s only been a month! What am I to do for the next 11 months?!

But I also felt like there wasn’t much I wanted to write about that was related to homemaking, baking, cooking, decor, fitness, etcetera, etcetera. I’m actually waiting for a Duncan Hines cake to come out of the oven right now, so I figured I’d kill some time writing an entry. The cake is for the kids’ graduation. All three are graduating from a milestone year at school. Next year they will all be at different schools and as much as we all commiserate about the demands of parenthood, schlepping them hither and yon to school, daycare, hockey, swimming, blah, blah, blah, I know it will pass in the proverbial blink of an eye.

We are also days away from heading back east for the summer, which means now seems like a good time to reflect on our relocation to Northern California. It’s been almost five months to the day since the Big Move. I won’t lie to you–it’s been difficult for all of us in different ways. I think the biggest challenge for me has been the separation from our family and close friends, which won’t come as a surprise to many of you. I’ve also been really uncomfortable with unemployment. I managed to work remotely for the first three months, which helped immensely with the transition. Had it not been for a good friendship that I have struck up with a fellow Canadian (from Ottawa), I’m not sure I’d be in as good a place as I am now. We are in constant contact without being needy (at least, I hope I’m not!). We go on long walks and hikes regularly and our 11-year-olds have become good buddies.

I also joined the schools Gardening Club and purchased a summer “plot” even though I won’t be here to tend to it. I have made friends with some of the moms at the school who are fellow Garden Clubbers, which has also been a great comfort.

Those amazing Canadian Moms In Silicon Valley have also been my saviours. We are a mixed bunch at various stages of expat-ness, but we have our motherhood and national pride in common and that is a tie that binds us. A big shout out to Kathryn for being my life ring in the choppy seas of relocating.

Finding my “tribe” has kept me afloat on this crazy adventure. So, too, has my husband. I remind myself regularly that I’m not the only one who has had to make adjustments. And yet I feel a great sense of responsibility to each member of the family to make sure they are good, physically, mentally and socially.

Highlights of the Big Move: 

Hiking the Quicksilver Foothills (literally in our neighbourhood backyard)

One of the nearby trails I have hiked a few times

Gardening Club at the elementary school

All ready for a fun garden activity with the kids

Exploring the region (oceans and mountains)

Postcard-worthy shot of the Carmel-to-Big Sur coastline along Highway 1

Time…to cook and bake

A one dish dinner that was better than anything we could have got at a restaurant

The finished product

Writing letters home to my friends

I don’t have a photo for this one, because, who really needs to see the envelopes and stamps? But what I DO love is finding the perfect card for the right person. I think many of them would be copyrighted so I’m not about to photograph them and post them on my blog (although who are we kidding? is anyone of any import really going to read this and report me??). I have found solace in putting pen to paper and writing whatever pops into my head and sending it off for my friends to receive in the mail. Maybe I will singlehandedly revive the lost art of letter writing, or maybe not. I just know I’ll keep doing it because it makes me feel good.

Now I’m thinking about my next “move” (no, we aren’t moving to another city) when we return from our summer vacation. I will look for more volunteer opportunities, possibly putting my communications and writing skills to use. I am also considering some self improvement through online courses; maybe I can still learn something as I grow long in the tooth. And of course I need to keep up with my fitness; I still can’t seem to accept the mushy middle that is my mummy tummy, but I’m not willing to give up chocolate and chips, not gonna happen. So I’m going to have to devise another plan to feel good about my body. I think that’s plenty for me to contemplate over the summer.

Okay, the cake is done and it’s late so that’s the end of this post. Besides, I have to wake up at the crack of dawn and drive up to Berkeley to make a big batch of jam….more on that later!!!

What To Do With Leftovers: Rice

How many times have you found yourself transferring all the little bits and bites left canada cialis online over after a meal (in my case, and probably most cases it’s dinner) into various sizes of plastic containers?

And while you’re doing this you’ve got a little angel sitting on one shoulder saying, “you are for sure going to find a way to use these leftovers and not let them go to waste. You will incorporate them into a future meal some time in the next 48 to 72 hours.”

Meanwhile on the other shoulder is perched a little devil saying, “Why bother? It’s just going to end up in the back of the fridge, also known as the wasteland of lost and forgotten food that is sure to become a science experiment utterly unrecognizable to any food group.”

Well if you’re anything like me your intentions are always noble but getting to those poor leftovers when there are fifty million other items on my daily to-do list doesn’t always happen. Not to mention coming up with a creative way to incorporate the leftovers into a meal that won’t have my kids groaning or turning their noses up.  Sometimes the mental exertion required to do this is just too much.

But there are some leftovers that are just too good to go to waste and I have resolved to make an effort to reinvent them into scrumptious dishes that will have my kids–and hubby–asking for seconds only to find it is all gone.

My mother was particularly good at upcycling our leftovers, although I wasn’t always that enthusiastic about eating them. I recall one time cutting into a piece of lasagna and looking at the filling, when I turned to my mom and said, “Wait a minute, isn’t this chicken from last night’s dinner?” She started out with a slightly sheepish look on her face mixed with a little giggle followed by an indignant glare (does that course of emotions make any sense to you?). I can’t remember what she said but it was a bit of a running joke with us because we could always count on my mom not to let good food go to waste. So I’m taking a page out of her book.

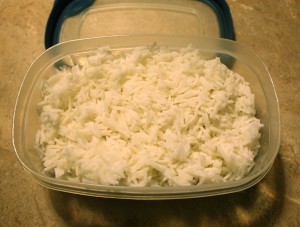
We had a couple of cups of basmati rice left over from dinner tonight, which got put into a container and shoved in the fridge. Feeling slightly more energetic than I have been in the last week because of a terrible cold, I decided to make rice pudding, which is one of my favourite comfort foods and the perfect antidote to winter.

The lowly leftovers
The lowly leftovers


My grandmother used to make a baked rice pudding that ended up with a thin layer of custard on top, but I have yet to find the recipe. Until then I’ve been playing around with recipes that I’ve found online.

I had roughly 2 cups of cooked rice so here’s my adaptation on a number of stove top rice pudding recipes I have found:

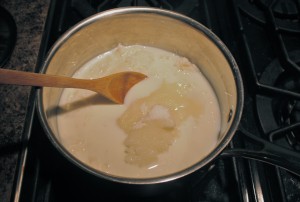
In a large sauce pan combine 2 cups of cooked rice with 1 1/2 cups of milk (I mixed skim and whole milk), reserving another 1/2 cup of milk for later. Add 3/4 cups of sugar and a pinch of salt. Cook over medium heat stirring constantly until the mixture begins to thicken.

Mix the rice, milk, sugar and pinch of salt

Beat 2 eggs and set aside. Turn down the heat and to the rice and milk mixture add the remaining 1/2 cup of milk, beaten eggs (make sure they don’t cook when you add them otherwise you end up with scrambled eggs a la rice pudding). Stir for another couple of minutes. Remove from heat.

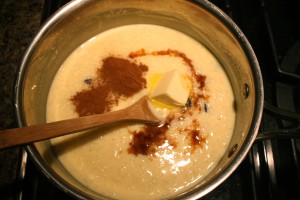
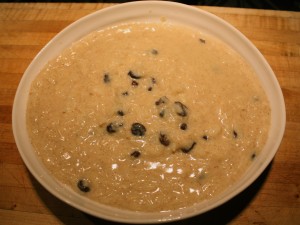
Add 2 Tbsp. of unsalted butter, 3/4 tsp. cinnamon, 3/4 tsp. vanilla extract and 1/2 cup of raisins to the mixture. Stir until thoroughly combined. You can serve this warm or cold and even divide it into individual cups. I prefer putting it in one big serving bowl and letting it cool a bit.

Butter, cinnamon, vanilla and raisins

I could seriously eat this morning, noon and night it’s that yummy. Let me know if you have a much loved rice pudding recipe. Better yet: if you have a much loved leftover recipe let me know and I’d be happy to feature it!

Rice pudding: the ultimate comfort food

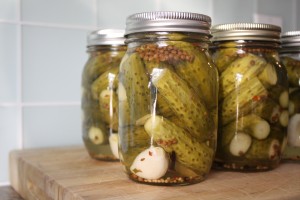
Mmm….garlic dills!

Until today the only canning I had done was making jam. As of today I can add pickling to my repertoire. On a whim I bought a batch of mini pickling cucumbers. I knew time was working against me so while the baby was napping this morning I got to work. Sterilizing, boiling, brining, cutting, pouring, processing and voila, pickles!!!!

I found the recipe on a fabulous site called Food In Jars, which was fairly simple to follow. The only deviation was the pickling spices. Rather than make my own I bought a pickling spice mix at the grocers–much easier and less time consuming. Oh yes, and I didn’t have cider vinegar so I went with straight white vinegar.

Now comes the hard part: waiting. The recipe says they can be stored in a cool, dry place for up to a year but it doesn’t say when I can dig into them….maybe 3 months? 3 weeks? 3 days? 3 minutes? I’m not sure I can wait!!!


Kitchen Cheat Sheets

I was perusing Pinterest just before hitting the sack when I came across this fancy dancy kitchen cheat sheet. Although it applies moreso to people living in the UK, as it from Everest, I thought those of you who are diehard cooks and bakers would appreciate it. It’s a fabulous retro-looking download that you can print off and put up on your fridge or at the very least keep in a drawer close by for when you need to convert weights to cups, etc. Enjoy!


cialis online

Dinner for a hot summer evening

When I opened the front door this morning I was hit by a wave of hot air not unlike that which escapes from the oven when I’m baking cookies, except this was the air outside. Everywhere. The air we breathe. The forecast called for temperatures in the mid-30’s with a Humidex in the mid-40’s. Ugh!

Even thought it was morning I was already thinking about what to make for dinner. The last thing I wanted to do was turn on the oven IN the house. And I certainly didn’t want to fire up the barbeque and stand in front of a flaming hot grill. 

So I decided to make my version of a Nicoise salad. Nice and simple but hearty enough to fill the belly–and super easy.

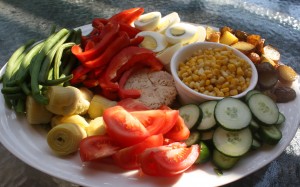
First the fresh stuff: blanched green beans, sliced cucumbers, sliced tomatoes. and sliced red peppers.

Then the proteins and canned goods: a tin of tuna, a tin of chick peas, a tin of corn niblets, a tin of artichoke hearts and some sliced hard boiled eggs.

And finally I roasted some mini red potatoes, but I only used the toaster oven so my kitchen remained at a comfortable temperature.

Nicoise Salad

I think a true Nicoise salad also includes anchovies but I can’t count a single person in my household who would eat those salty suckers so I didn’t even consider it.

The boys gushed over the meal (they love hard boiled eggs and canned corn) and not a single bead of sweat was required in the preparation of this meal so I think I’ll be making this again soon.

Next time I might throw in some golden beets and avocado–other favourites in our household. If you’ve made your own signature version of a Nicoise salad let me know what you put in it.

We Be Jammin’

It’s that time of year again–the sacred few weeks when Ontario strawberries are in season. And that means it’s time to roll up my sleeves and make batches of sweet, yummy jam for everyone to enjoy–including the teachers. I always try and make the jam before the end of the school year so the boys can give jars of jam as gifts to their teachers.

If you have ever contemplated making jam but have been intimidated by the thought of it, don’t be. It’s the easiest thing ever. The only thing that might make you shy away is the steps involved–not many, but time consuming.

Before any jam making begins you must wash and sterilize your jars. It’s important to do this first otherwise your jam will start setting and you’ll be busy scrambling to get your jars ready.

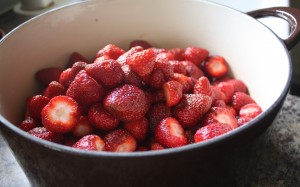
First you have to wash and hull all the berries–probably the most time and labour intensive step in the process. You’ll also have a hard time resisting eating the berries as you wash them!

Ontario strawberries

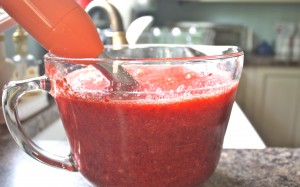
Crushing the berries is the next step. Up until this year I simply used a potato masher to do this. But I got a hand blender recently and used this to crush the berries–actually I turned them into a pulp which made for a very runny, smooth jam. If you prefer having chunks of berry in your jam, make sure not to crush them too much.

Crush the strawberries

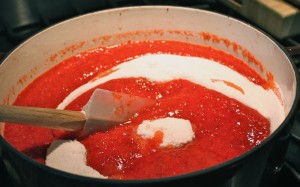
Next stir in the sugar. I like to use a product called Quick Set, which has some pectin in it already to help thicken the jam. If you want to know the berries-to-sugar ratio, it’s 1 kilo of sugar to 4 cups of *crushed* fruit but I just follow the directions on the bag. 

Berries and sugar!

Now it’s time to cook up the jam. Over medium heat in heavy pot let the mixture cook for 5 to 10 minutes. A foamy pink “scum” will form on the top of the jam and you need to skim this off with a spoon. The jam will come to a rolling boil and once that’s happened your jam is finished cooking.

Next get your jars out. Fill the jars almost to the top–leave a few centimeters for air to escape. I use snap lids on my jars. Once filled, I pop the jars in boiling water making sure the water covers the top of the jars completely and let the water boil away for about 10 minutes. This is called processing and it’s necessary so you can store the jars without refrigerating them. You’ll know this step worked when you hear the lids literally “snap” when they are suctioned down. You’re done! 

Mmmm...jam!

Now you can enjoy your jam slathered on a piece of fresh bread or crackers. Believe me, once you taste the jam you’ll realize it was worth all the effort.