Category: food

Dinner for a hot summer evening

When I opened the front door this morning I was hit by a wave of hot air not unlike that which escapes from the oven when I’m baking cookies, except this was the air outside. Everywhere. The air we breathe. The forecast called for temperatures in the mid-30’s with a Humidex in the mid-40’s. Ugh!

Even thought it was morning I was already thinking about what to make for dinner. The last thing I wanted to do was turn on the oven IN the house. And I certainly didn’t want to fire up the barbeque and stand in front of a flaming hot grill. 

So I decided to make my version of a Nicoise salad. Nice and simple but hearty enough to fill the belly–and super easy.

First the fresh stuff: blanched green beans, sliced cucumbers, sliced tomatoes. and sliced red peppers.

Then the proteins and canned goods: a tin of tuna, a tin of chick peas, a tin of corn niblets, a tin of artichoke hearts and some sliced hard boiled eggs.

And finally I roasted some mini red potatoes, but I only used the toaster oven so my kitchen remained at a comfortable temperature.
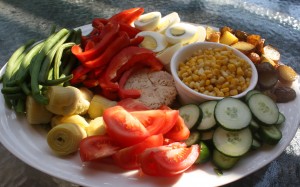
Nicoise Salad

I think a true Nicoise salad also includes anchovies but I can’t count a single person in my household who would eat those salty suckers so I didn’t even consider it.

The boys gushed over the meal (they love hard boiled eggs and canned corn) and not a single bead of sweat was required in the preparation of this meal so I think I’ll be making this again soon.

Next time I might throw in some golden beets and avocado–other favourites in our household. If you’ve made your own signature version of a Nicoise salad let me know what you put in it.

We Be Jammin’

It’s that time of year again–the sacred few weeks when Ontario strawberries are in season. And that means it’s time to roll up my sleeves and make batches of sweet, yummy jam for everyone to enjoy–including the teachers. I always try and make the jam before the end of the school year so the boys can give jars of jam as gifts to their teachers.

If you have ever contemplated making jam but have been intimidated by the thought of it, don’t be. It’s the easiest thing ever. The only thing that might make you shy away is the steps involved–not many, but time consuming.

Before any jam making begins you must wash and sterilize your jars. It’s important to do this first otherwise your jam will start setting and you’ll be busy scrambling to get your jars ready.

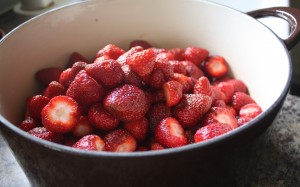
First you have to wash and hull all the berries–probably the most time and labour intensive step in the process. You’ll also have a hard time resisting eating the berries as you wash them!

Ontario strawberries

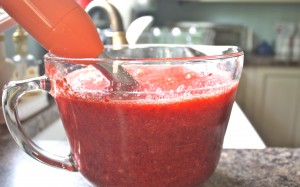
Crushing the berries is the next step. Up until this year I simply used a potato masher to do this. But I got a hand blender recently and used this to crush the berries–actually I turned them into a pulp which made for a very runny, smooth jam. If you prefer having chunks of berry in your jam, make sure not to crush them too much.

Crush the strawberries

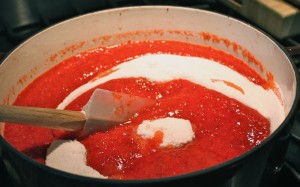
Next stir in the sugar. I like to use a product called Quick Set, which has some pectin in it already to help thicken the jam. If you want to know the berries-to-sugar ratio, it’s 1 kilo of sugar to 4 cups of *crushed* fruit but I just follow the directions on the bag. 

Berries and sugar!

Now it’s time to cook up the jam. Over medium heat in heavy pot let the mixture cook for 5 to 10 minutes. A foamy pink “scum” will form on the top of the jam and you need to skim this off with a spoon. The jam will come to a rolling boil and once that’s happened your jam is finished cooking.

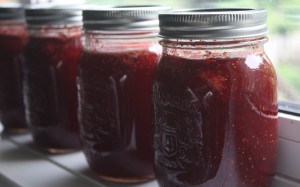
Next get your jars out. Fill the jars almost to the top–leave a few centimeters for air to escape. I use snap lids on my jars. Once filled, I pop the jars in boiling water making sure the water covers the top of the jars completely and let the water boil away for about 10 minutes. This is called processing and it’s necessary so you can store the jars without refrigerating them. You’ll know this step worked when you hear the lids literally “snap” when they are suctioned down. You’re done! 

Mmmm...jam!

Now you can enjoy your jam slathered on a piece of fresh bread or crackers. Believe me, once you taste the jam you’ll realize it was worth all the effort.


Tasty Treats: Rugelach

I have a weakness for rugelach (the ch is that hard, throaty sound that one perfects through one’s Jewish upbringing). Unfortunately indulging in these tasty treats only happens at special occasions, which includes dinner at my in-law’s and sadly at shivas. Why? Because these devilish but divine desserts are expensive! Yes, you have to pay by weight. And much like chips, you can’t eat just one. 

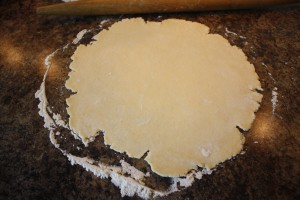
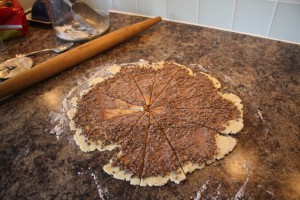
Rolled out rugelach dough

Now I know why the bakery charges for rugelach by weight–because there are so many steps involved in the making of them! And one recipe only produces a dozen and a half of them. So that’s a huge investment of time for little return. I found a recipe in Evelyn Raab’s book, The Clueless Baker. My copy is well loved and well worn. I’m not sure it’s still in print but if you can find one I strongly recommend adding it to your repertoire of cook books. The dough is actually more of a pastry made with butter, cream cheese, flour and a bit of sugar. The whole recipe itself is easy, it’s just the time and steps required are labour intensive. Once the pastry is made I had to divide it into three portions, shape them into round discs and refrigerate them for at least an hour.

While that was happening I made a mixture of chocolate chips, cinnamon and sugar. The recipe also called for walnuts but I didn’t have any. I whizzed the mixture through the food processor. Then I rolled out the pastry dough and sprinkled the mixture on it.

Rugelach pastry dough with filling

The next step is to take a pizza cutter and cut the dough into about eight or ten wedges. This was followed by the final step, which was to roll each wedge from the wide end to the point into a crescent shape. 

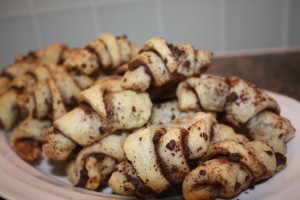
Ready to bake

Baking the rugelach for about 20 minutes was the final step–actually eating them was the final step. They turned out so flakey and light and the perfect balance of chocolate and cinnamon. But was it worth the time and effort? According to reaction from my family it was. So I think I’ll be making these again.

Mmmm...rugelach!

cialis

levitra

I’m Ba-ack!!!!

Okay, it’s been WWWaaaaaaaaaaYYYYYYYYYYyyyyyy too long since my last post. But life gets in the way–a NEW life, in fact. Yes, we welcomed baby boy #3 into our lives about 3 months ago. So we’re through the first tough stretch with him, which I guess should allow me to turn my attention to some other items on my *to do* list. In the last 48 hours that includes baking a key lime pie, a banana chocolate chip cake, mowing the lawn and cutting out the pieces for two baby quilts, which should have been made a long time ago.

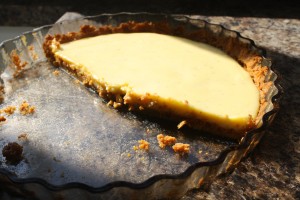
Mmmm...key lime pie!!!

The key lime pie was an homage to our recent trip to Floridahhhhh….it came out a bit on the tarty-limey side, and the crust was a little too hard for my liking but not bad for my first attempt. The most annoying part of the recipe was juicing all those tiny key limes to get half a cup of juice. I used my reamer but quick work it did not make. The recipe is from Martha Stewart if you’re interested in trying it.

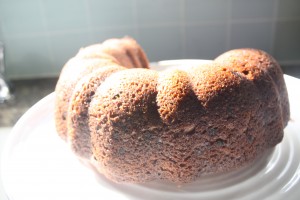
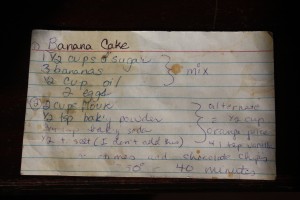
Best Banana Chocolate Chip Cake EV-ER

The banana chocolate chip cake is my go-to stand-by dessert. I make it into muffins, cakes, loafs…you name it. If you’ve got bananas sitting in the freezer or spotty ones sitting on the counter that no one in your family is going to eat, then this is the recipe for you! If you can decipher the recipe I’m posting, it’s yours. I’m not going to make it easy because I guard this recipe closely. It came from my mom’s friend Fern, and I get nothing but compliments when I bake it. Enjoy!!!


Banana Chocolate Chip Cake Recipe